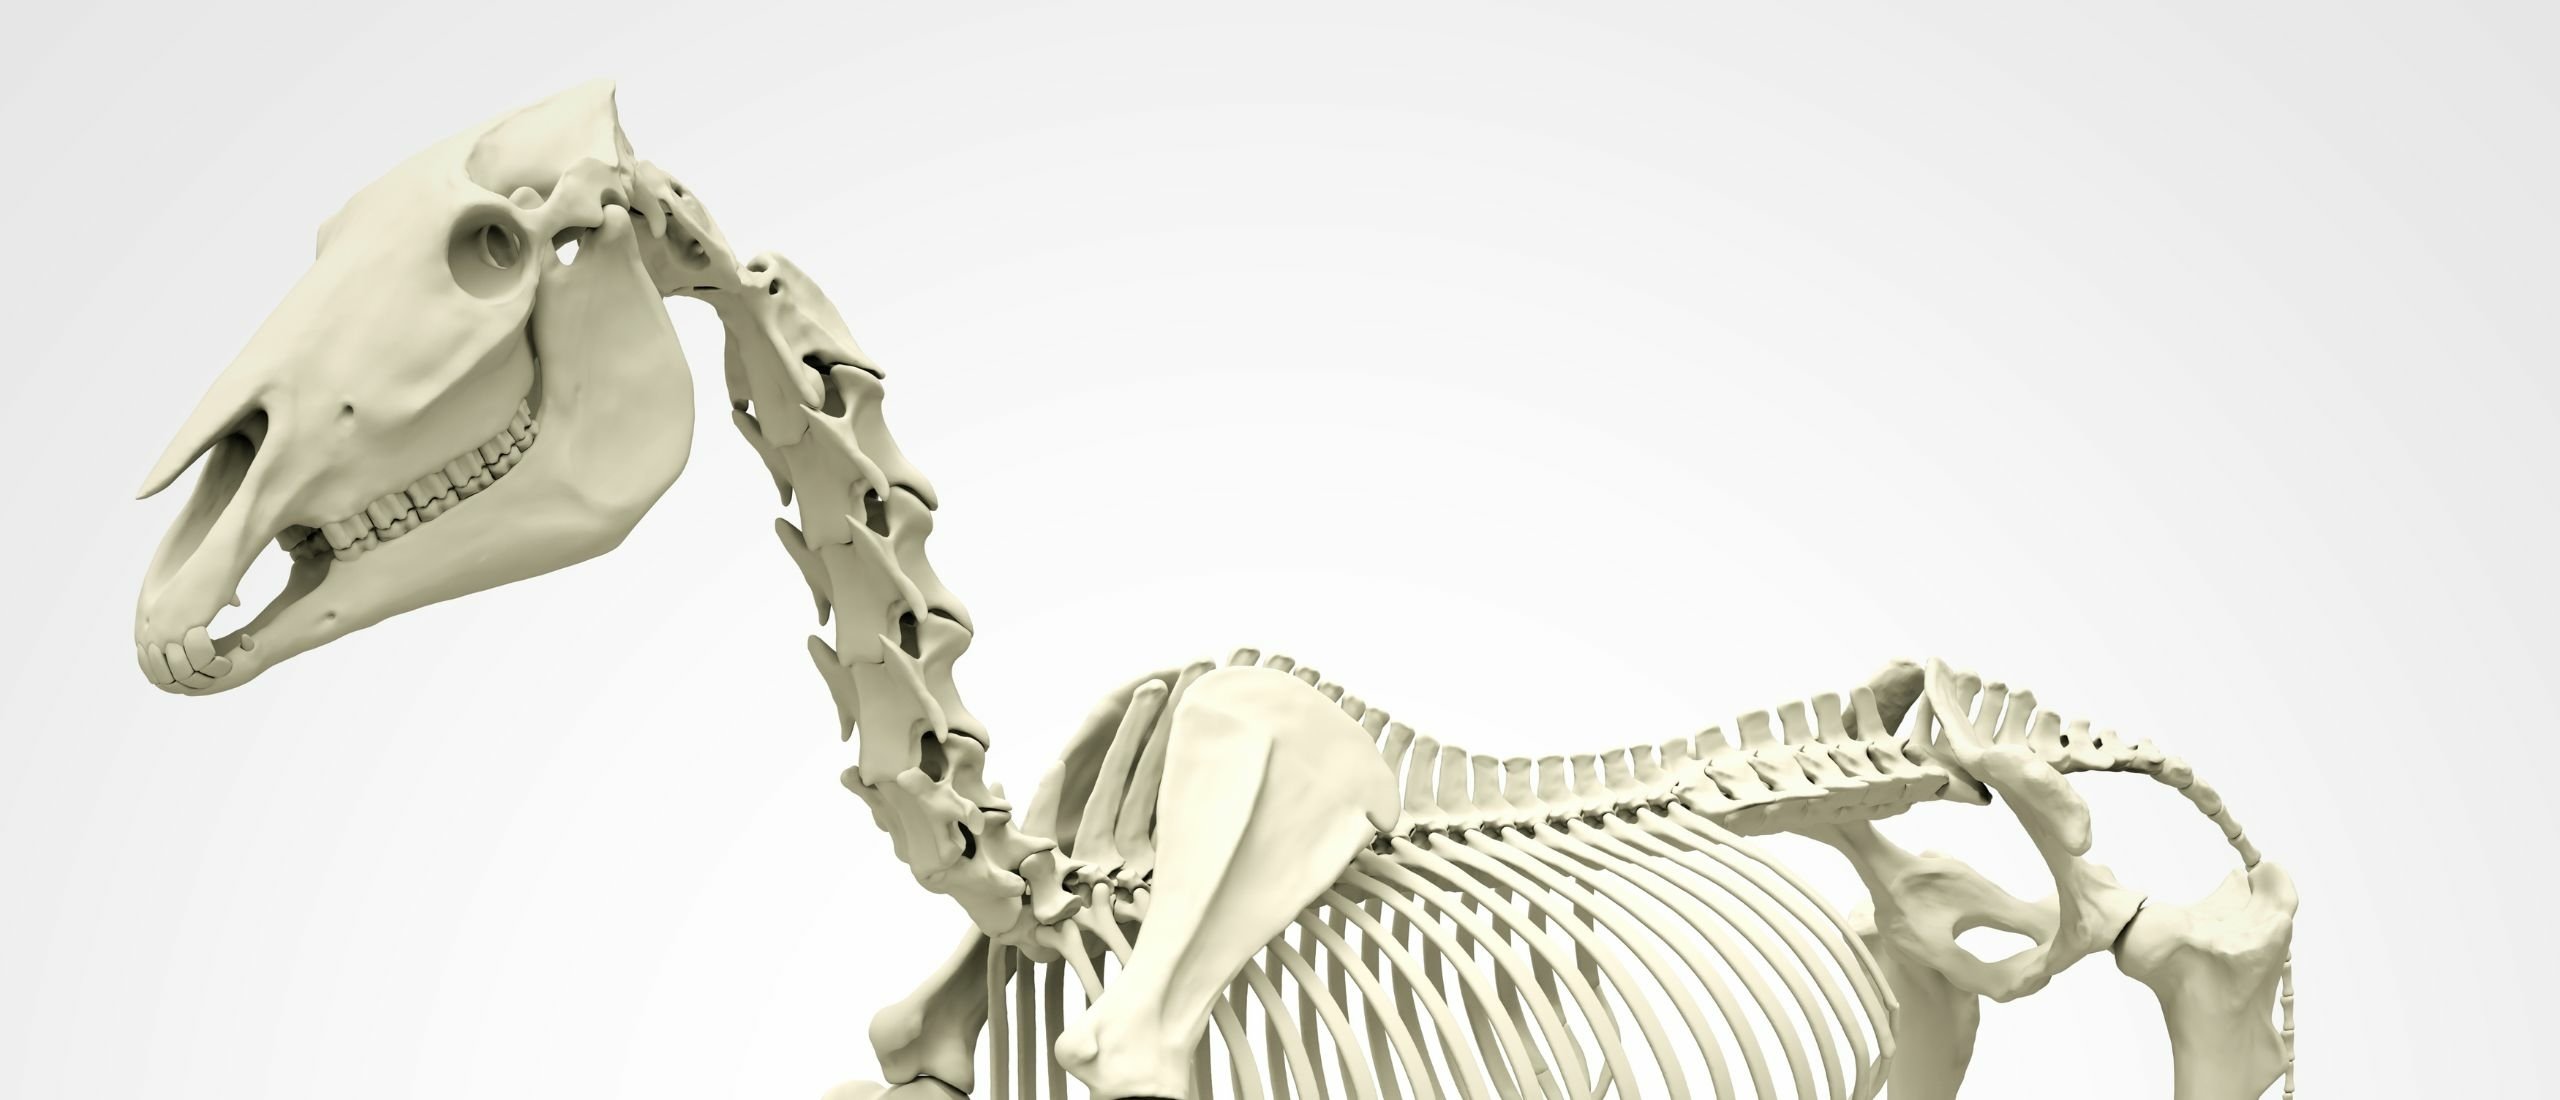
Skeleton of the horse
The skeleton of the horse consists of a framework of bones to form a solid support for the body and to provide movement, and it consists of:
- Skull bones
- Vertebrae, which form the spinal column
- Ribs
- A chest bone – sternum – which is attached to the 8 pairs of ribs
- Bones in the front legs
- Bones in the hind legs
There are not enough words to describe in complete detail what exacly happens when the horse moves his over 200 bones, with his 700 skeleton muscles, and how the fascia, tendons, ligaments, neurotransmitters, hormones and other elements are involved. The map is never the territory, it will always be a simplification of the real, highly complex world and give a limiting view on reality.
Nevertheless, to optimize the training of your horse, a map of the horse’s skeleton might be very useful as a tool to understand the complex multi-dimensional reality with all its dynamics, so let’s dive a bit into the map by viewing this video first:
First, let’s have a closer look at the bones and joints in the horse’s legs, then the spine and connected ribs, sternum and skull:
Front and hind legs
The fragile front legs support about 3/5 of the horse’s weight – called the natural balance – and that’s one of the reasons that the majority of lameness cases and being worned out early concerns the front legs, mostly the most ‘handed’ front leg.
That’s why we do Straightness Training (ST): first to equalize the amount of weight on all four legs – called the horizontal balance, where each leg carries 25% of the weight – and then to shift the weight more back to the flexible hind legs.
This artificial ‘riding’ balance is the goal of ST, in which 3/5 of the body weight is carried by the hind legs to free the fragile front legs and to carry the rider in a healthy way.
To get to this artificial balance, we need to supple and strengthen the hind legs. The hind legs contains seven joints which help with movement and make the hind legs flexible and powerful:
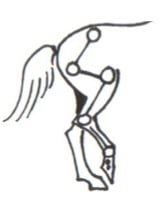 1. the sacroiliac joint, which connects the spine with the hind legs
2. the hip joint
3. the stifle joint
4. the hock joint
5. the fetlock joint
6. the pastern joint
7. the coffin joint
A joint is a movable connection between two bones and it provides movement in response to the contraction and lengthening of muscles. The seven joints make it look like an ‘accordion’ or a ‘spring’ and allow the hind legs to develop the carrying potential.
Through the sacroiliac joints, the energy that starts in behind is transferred through the spine towards the front. The bones in the front legs are shorter and straighter than those in the hind legs and have only three of these ‘spring’ joints (red dots) to absorb concussion and the power that is generated by the hind legs, which makes them quite fragile.
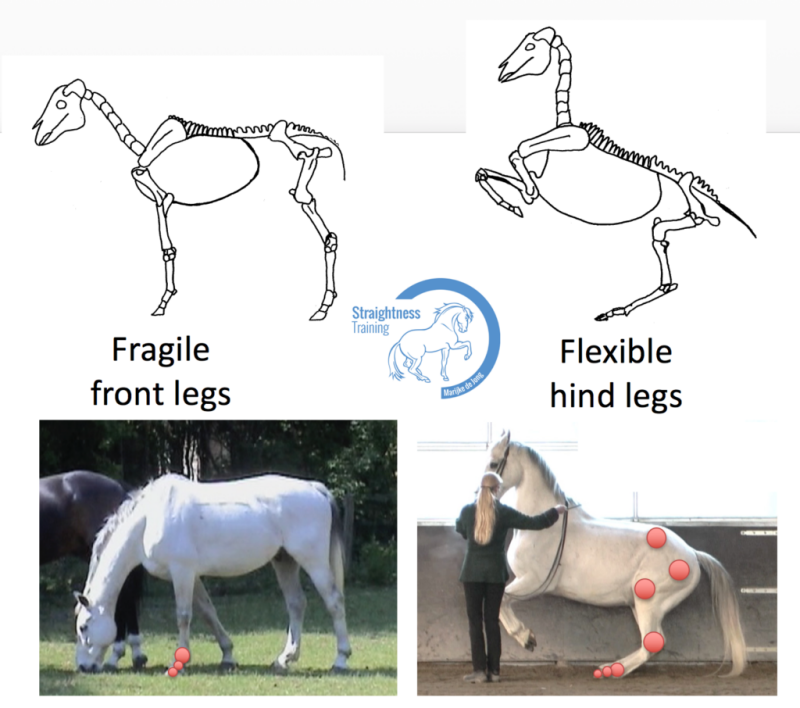
The six keys of Straightness Training will help you to develop this carrying potential of the hind legs, since:
- Key #4 is about the bending of the inside hind leg
- Key #5 is about the bending of the outside hind leg
- Key #6 is about the bending of both hind legs
But to be able to get to key #4, #5 and #6 we first have to get access to the first three keys, and we do so by influencing the horse’s spine.
The spine
The spine is the skeleton part that forms the connection between the front and hind legs – apart from the neck and tail area of the spine.
The spine plays an important role in movement, since in most ST exerises, such as circles and lateral movements, we want our horse to move with a proper LFS, which are the first three keys of Straightness Training:
- Key #1 is the Lateral bending in the body
- Key #2 is the Forward down tendency of the head and neck
- Key #3 is the Stepping under of the inside hind leg.
When practising the LFS, the spine will automatically bend, flex and rotate:

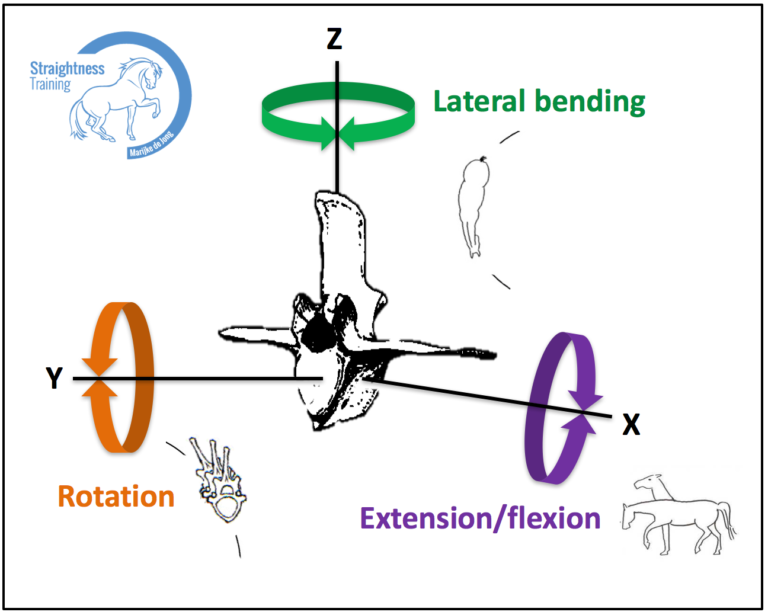 The movements of the spine can be measured in three dimensions by setting up three axes: x, y, z.
Depending on their location and construction a vertebra will move in three different directions:
X: Extension/flexion
Y: Rotation
All of some of these three types of movement – extension/flexion, rotation and lateral bending – occur in each part of the spine.
Semantic difference
To be more clear: there’s a semantic difference between the lateral bending as dimension of the spine and lateral bending in the whole body:
- The lateral bending in the spine, is a dimension of thespine. It is the phsycial ability to bend more or less in certain areas of the spine.
- The lateral bending in the body, concerns the whole body. It is a collective name that we use in Straightness Training for everything that happens in the horse’s whole body (muscles, legs, spine, bending, rotation, flexion) to gain the ability to bend with the arc of the circle in both directions and to allow the body to do lateral movements. This ‘lateral bending’ is a metaphor, a figure of speech, because a lot of factors together will create the illusion of lateral bending the body.
So when people start to argue about that lateral bending, it’s sometimes a semantic discussion. Now the metaphor originiated due to history, so let’s dive into a bit history first:
History of ‘bending’
Gustaf Steinbrecht (1808–1885) wrote in his book ‘The Gymnasium of the horse’ a lot of chapters about ‘bending’. What he literally describes in his book about ‘bending’ is at times scientifically obsolete, but let’s see what Steinbrecht has to say about ‘bending’:
In the original – German – version of Steinbrecht’s book, you can find the following chapters in the book:
- Bending of the neck
- Bending of the poll
- Bending of the rib cage
- Bending of the back
- Bending of the hind legs
In chapter 3 he discusses the chest area – the area of the ribs – and chapter 4 is about the lumbar area – the area behind the saddle. Nowadays, in the English version of the book chapter 3 and 4 has been combined to ‘Bending of the spine’, but it’s interesting to see the original chapters in the spirit of age:
Steinbrecht speaks a whole chapter about ‘bending of the ribs‘ and ‘bending of the rib cage‘ and what he means by that, is pushing the ribs close to each other on the concave side.
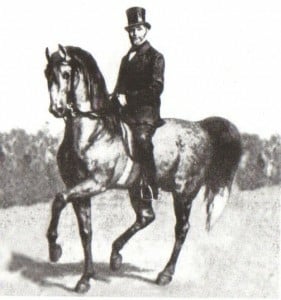 He writes (translated from the original German book):
“The correct and well founded bending of the rib cage or lateral bending of the back vertebrae is a main characteristic of a well ridden horse…
… it forms the soul of the art of riding…
… as a part of the spine, the back vertebrae must be bend laterally according to the same rules as the neck vertebrae, but working them is easier, because they are more fixed by the rib cage and therefore have less of a tendency to bend incorrectly and in an exaggerated manner.”
Over the years, science has brought new light to spinal movement: the horse ‘appears’ to bend evenly from head to tail, but nowadays reseach has proven that this is anatomically seen not possible because of the difference in flexiblity in all areas of the spine. We now know that also rotation is needed to create the ‘illusion’ of lateral bending.
Steinbrecht often describes the illusion of bending that he ‘sees’, but what he ‘feels’ is the combination of bending, rotation, and/or flexion in certain areas of the spine:
“The rider recognizes the correct, well founded rib cage bending immediately by his secure, comfortable seat with a slight, natural tendency towards the inside….”
and a few sentences later he writes:
“… the tendency of the rider to hang inward, keeping both bodies in harmony and simultaneously match the laws of centfigal forces on curved lines…”.
Nowadays, ‘lateral bending’ is still the most useful image and metaphor for rider and trainers, because when the horse ‘feels’ and ‘looks’ as if the horse is evenly bended from head to tail, he turns in a balanced way, not falling on the inside shoulder or leaning over the outside shoulder, and that’s what matters most.
But again, physically seen, the body ‘appears’ to bend evenly in the spine, from his poll to his tail, but anatomically seen that is not possible, and let’s see why:
Lateral bending of the spine
The spinal column can bend to the left and to the right, but is not flexible throughout the length of the spine because of the vertebrae:
- Part 1: 7 neck vertebrae: This is the most flexible part of the spine, so the horse can very easily bend his neck. The neck also easly ‘overbends’, which means that the neck is not aligned with the body.
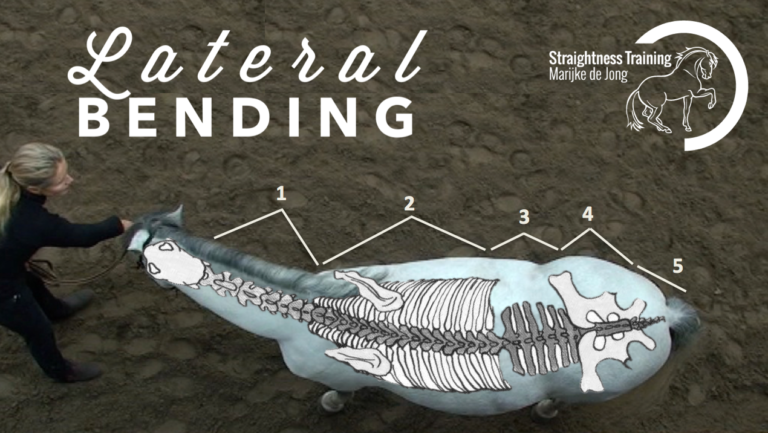
- Part 2: 18 chest vertebrae: This is a relatively stiff and rigid area, because of the connection with the ribs. Each rib is about 3-4 cm (1-1.5 inch) wide and the space in between the ribs is about 3-4 cm (1-1.5 inch) to allow the horse to breathe. The first 8 pairs of ribs are connected to the top of the first 8 chest vertebrae and at the bottom they are connected to the sternum. Not a lot more flexibility can be expected from the other 10 vertebrae and 10 ‘false’ ribs. So there’s very limited flexibility in the chest area because of the connection with the rigid ribs and therefore Steinbrecht’s ‘rib bending’ is anatomically seen not possible.
- Part 3: 6 lumbar vertebrae: This area is more flexible, because there is no connection to the ribs, but there is limitation because of the large transverse processes which would hit each other if there was too much sideways movement,
- Part 4: 5 connected croup vertebrae: This area is not flexible and cannot bend, because the vertebrae are united in the sacrum.
- Part 5: 15-20 tail vertebrae: The tail will generally hang to the left when the horse turns to the left and to the right, when he turns to the right.
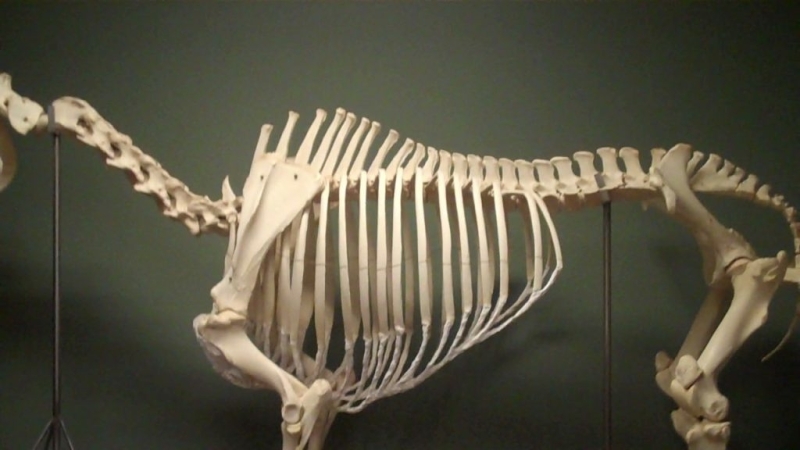
How much an area (neck, chest, behind the saddle, area of the pelvis, tail) can bend, depends on the shape of the vertebrae (body, spinous process) and the construction (connected to ribs or other vertebrae or not). Therefore, the flexibility of the spine differs in each part.
So the neck is the most flexible part (1), followed by the lumbar region (3). Bending in the rib area (2) is hardly possible and the croup vertebrae (4) are connected and cannot bend at all.
Therefore, when riding circles or lateral movements, some vertebrae and parts of the spine also need to rotate and flex, and this three dimensional spinal movement creates the ‘illusion’ of lateral bending in the body.
LFS
Let’s see what happens in the horse’s skeleton when we invite the horse to move in LFS on the circle in ST:
Part 1 – The neck vertebrae:
- The lateral bending is relatively uniform along the length of the neck and the horse can easily overbend his neck, so we have to take care of that.
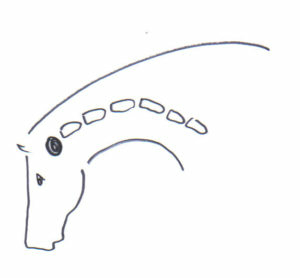
- Extension/flexion are maximal at the joint that connects the head to the first neck vertebra and because of this joint the horse can shake his head as if he is saying ‘yes’. This ability allows a horse to go for example too much behind the vertical during the work. In ST we strive for having neck flexed ‘forward’ and the nose ‘down’ and slightly in front of the vertical (see drawing). In ST we avoid extension of the neck, because the higher the head and neck are carried, the more the back will hollow and the shorter the strides of the hind legs will be.
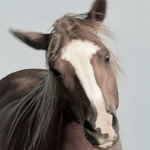
- The first two neck vertebrae have far more ability to rotate as the other five: that’s why a horse can tilt and twist the head during the work (having the ears not level, so one ear lower than the other). The horse might start to tilt the head if the rider uses too much, too long pressure on the inside rein. But the tilting could also be a result of an inside hind leg not stepping under well, because what happens on one end of the spine often relate to and influences what happens on the other end.
Part 2: The area of the chest and ribs:
- When it comes to the lateral bending, the chest area of the spine is very limited in the ability to bend, because of the connection to the ribs. The first 8 ribs are even more rigid because of their connection to the sternum. So to create the ‘illusion’ of lateral bending in the body, rotation in the chest area is needed.
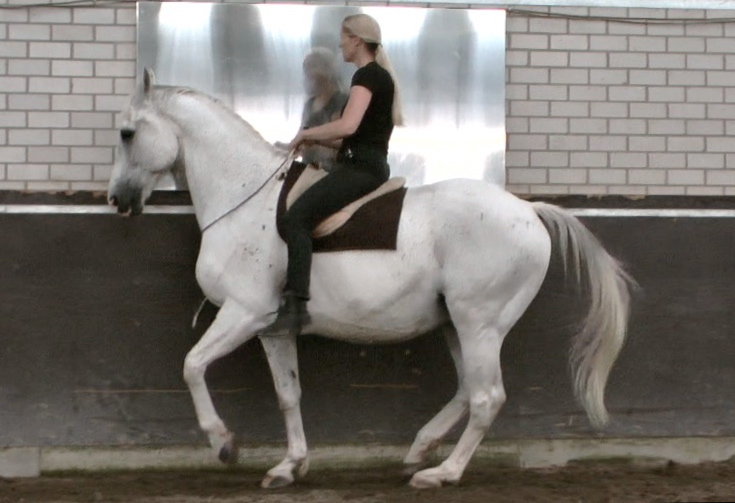
- A proper rotation of the chest vertebrea allows the rider to sit on the inside when doing ST (visible because the inside stirrup is a little lower), but for a proper rotation the horse needs to be supple.
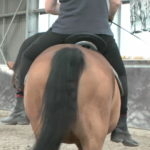
- Tension in the muscles and overbending of the neck can disturb proper rotation in the chest.
- When the rider overbends the neck of the horse, in combination with a shift of the center of mass to the outside shoulder (falling over the outside shoulder), rider and saddle often slide to the outside of the horse’s back (having the outside foot or stirrup much lower, see picture). Also a rider pressing the horse away from the outside seat bone in lateral movement might disturb proper rotation.
- Extension/flexion takes place at the chest area and it’s about the hollowing and rounding of the back. When a horse carries a rider with a hollow back, kissing spines may arise, because the spinous processes, which look like shark fins, might start to kiss each other. So in ST, at all times we encourage the ‘forward down’ tendency when riding a horse.
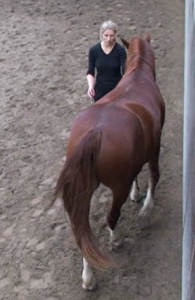
Part 3: The lumbar area (part behind the saddle):
- Because of the combination of bending and rotation of the lumbar vertebrae, the horse is able to produce the exercise haunches-in (picture).
- The connection between the last lumbar vertebra and the sacrum (lumbo-sacral joint) is – after the neck – the most flexible when it comes to flexion/extension. You can see that very clearly in the sliding stop, where the horse tilt his pelvis to the max.
Part 4: The sacrum (area where the hind legs connect to the spine):
- The sacrum consists of five connected vertebrae, so it cannot bend, only rotate. The hind legs are connected to the pelvis which is connected to the sacrum through the sacroiliac joints. When the horse moves on a circle to the right, the right hind leg will step further under the center of mass.
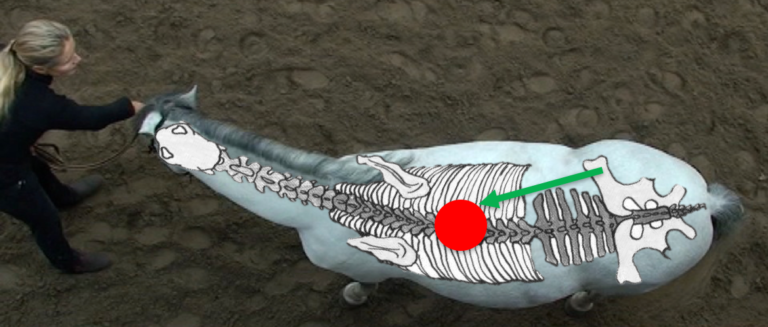
It’s very interesting to observe a horse in walk from above on a straight line – see the video below – so you can see that the pelvis tilts from side to side depending which leg is on the ground. This up and down movement is transmitted through to the sacrum to the lumbar vertebrae and then to the chest area, so the belly swings from left to right and back.
Research on spinal movement
There has been a fair amount of research done to figure out how much motion there is all three directions in different regions of the spine. Also equestrian books include opinions about spinal movement, which not always agree with each other.
Results of research are often reported in inches/centimeters, percentages and number of degrees, which are sometimes presented as ‘the absolute truth’.
To give you some examples:
- Sometimes the results state that the maximum possible bending in the whole spine is 15 cm, other results note 18 cm.
- Some results note that the greatest amount of rotation was measured in the chest area at the level of the 11th and 12th chest vertebrae joint. Other results measure an decreased rotation from the 9th until the 14th. Another source states that the biggest rotation is at the 18th chest vertebra, because that vertebrae is connected to the lumbar region, and the rotation in the lumbar vertebrae is greater than in the chest, because the tilt from the pelvis and sacrum, caused by the stepping under of the inside hind leg, is transmitted forward along the spine through the sacrum, to the lumbar vertebrae, to the chest vertebrae.
- Some books note that the chest vertebrae have to rotate outwards in the turn, other books state that the chest vertebrea have to rotate inwards.
- Some materials talk about specific ‘S shaped’ horses where head and neck are bended in one direction and the chest area in the other direction – so the chest vertebrae rotates in the opposite direction, not corresponding with the neck bending. Other materials state that every horse is ‘S shaped’ by nature: ‘left bended’ horses are left bended in the neck and rotates to the right in the chest, (and vice versa with right bended horses). So they state that all horses have a preferential chest rotation one way and they will choose to rotate that way no matter which direction they go. So wheather the neck bends to the left or right, the chest area keeps rotating in the an equal way to both sides.
The reason why there are different results, opinions and ‘truths’, is because the context matters when it comes to research and inside-out experiences.
Context matters
It’s important to see each research, analysis, experience, book and article within its context:
- Some of the research is done on dead horses where they can measure extremes, other research looks at horses alive and how they move naturally.
- Sometimes the analysis is done with uneducated (natural asymmetrical and stiff) horses, other research with educated (straightened and supple) horses.
- Sometimes the research is done with big warmbloods with long backs, other research with smaller horses with short backs.
- Some of the research is done on one single horse, other research focuses on a group of horses, some of the research used race horses, other dressage horses, some research is done in walk, other also in trot or canter. (For example “Six thoroughbred horses (mean age 9.6 years) cantered on a treadmill at four velocities”.)
- Sometimes the amount of movement between two vertebrae is mentioned, in other research the movement of a single vertebra is observed in 3D.
- Some of the books describe the proces based on horses on the longe with side reins, other base their work on horses at liberty.
- Some authors describe a theory on bending/rotation based on riding a horse with steady rein contact on both reins, other books base their theory on riding with a supple/soft inside rein and contact on the outside rein.
- Some authors ride with both seat bones going forward and backward at the same time, others ride with independent seat bones that go more synchrone with the movement of the hind legs of the horse.
- Some tests are done where the rider sits on the inside when riding lateral movements such as the half pass, inviting the horse to step under their center of mass. Other tests are done whith the rider sitting on the outside, pressing the horse away from their center of mass.
So with written materials and scientific research it’s always important to realize the context and on what grounds the results are based. Totally other outcomes may be expected if other types of horses or training and riding styles are used.
Because it makes a huge difference in influence on the spinal movement, if a rider rides with steady or strong contact on both reins or if the rider has a soft inside rein, allowing the horse to search towards the outside rein.
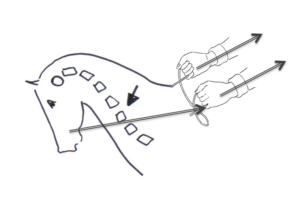
It also makes a huge difference if a rider is riding ‘on the bit’ (picture), ‘behind the vertical’, ‘against the hand’ or ‘towards the hand’, all four styles will influence the movement of the spine differently.
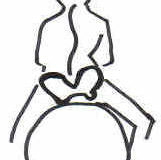 Also the asymmery of the rider in his own pelvis and spine will be of influence and if the rider sits on the outside or inside of the horse’s back in lateral movements.
And there are many other context factors that will influence the final outcome.
Therefore, it’s important to see each research, book, and article within its context.
Now just to be clear, this post is not meant to ‘find the truth’, or to dive into detailed scientific discussions, this post is just meant to give the ‘bigger picture’ and to realize that there are different ‘truths’ and ‘beliefs’, and they might be all true within their own context!
But that we have to be careful with making generalisations.
Remember the story of the scientists:
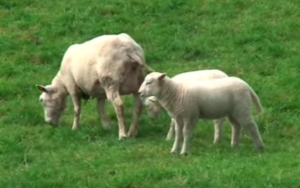
“Five scientists sit on the train and travel through Scotland. They look out the window and see a sheep in a pasture.
- Scientist #1 says: All sheep are white.
- Scientist #2 says: No, all sheep in Scotland are white.
- Scientist #3 says: No, all sheep in this pasture are white.
- Scientist #4 says: No, this sheep is white.
- Scientist #5: we can say with certainty that this sheep is white on this side.”
So just observe and define your own individual start position:
- What equestrian discipline do you apply?
- What breed, age, condition, stiffness, asymmetry, education has your horse?
- What riding style do you use, how do you use your reins (contact/lose reins/on the bit/behind the vertical/against the hand/yielding/searching towards the hand)?
- Are you left or right handed?
- What about your leg preference and dominance?
- How do you use your seat and center of mass?
What matters most
When you know your starting position, then what matters most is, that you reduce imbalance and stiffness both in yourself as in the horse. It’s important that you develop yourself and your horse symmetrically in body and limbs, plus that you strive for a proper riding balance to avoid unnecessary wear and tear of front legs and the horse’s back.
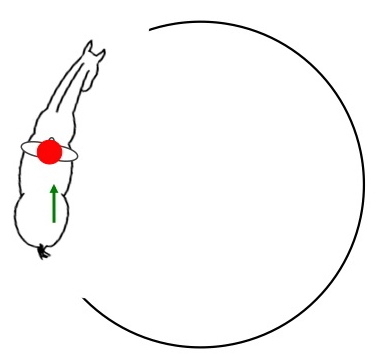
Because remember: by nature, a horse has a preference and dominance in the front legs, hind legs and body, so will turn more ‘easily’ to the left but not to the right, or vice versa. This preference and dominance not only cause stiffness when we start to ride our horse, but it also causes a diagonal shift of the center of mass (the red dot), which leads to falling in on the inside shoulder or falling over the outside shoulder (where he’s not willing and able to turn in).
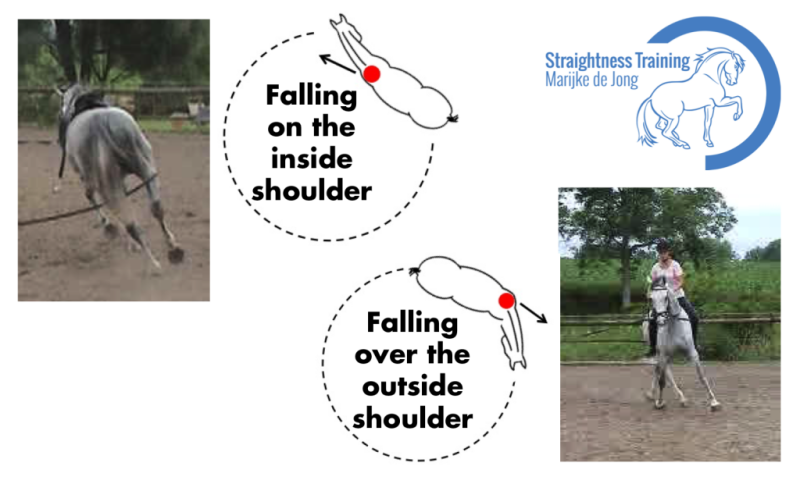
When this happens day after day, then in extreme cases your horse might get lame on this ‘handed’ front leg, because it carries the most amount of weight day in day out. It also stresses the horse’s back, so this diagonal shift of the center of mass, the diagonal imbalance, is the most destructive part and needs to be avoided at any times if we want to ride our horse.
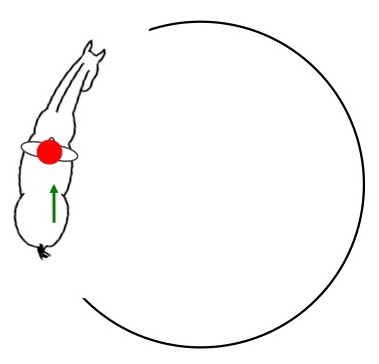
Therefore, it’s utmost important that we teach our horse to turn properly to both sides. We need to teach our horse to keep the center of mass in the correct position and to ask the hind leg to support that correct center of mass. Only then we can shift the center of mass more back to develop the carrying potential of the hind legs.
LFS is key
To teach a horse to turn properly, LFS is key, where the L, the F and the S are closely connected:
- Asking for stelling and bending, asked in front with the rein, will relax the long back muscle, making the head of the horse stretch forward down.
- The lateral bending that is started in front with the reins or longe line, will influence the lumber region and pelvis and therefore the inside hind leg will step further under the center of mass. At the same time, activating the stepping under of the inside hind leg will influence the pelvis, lumber region and chest, so it improves the lateral bending in the whole body from behind, resulting in a yielding on the inside rein and searching towards the outside rein in front. So we can and have to work the lateral bend in the body from both sides.
- The forward down tendency of the horse activates the hind leg to swing even further forward towards the center of mass so the hind leg makes an even bigger step forward.
So the first three keys are closely connected and one cannot exist without the others and the three keys must be trained in harmony.
That’s why we use the term ‘LFS’ to focus on these three keys as a unit during Straightness Training.
In ST, we practice the LFS first in hand and on the longe without the extra weight of the rider, and once the horse is more symmetrical in body and limbs, also with the additional rider’s weight.
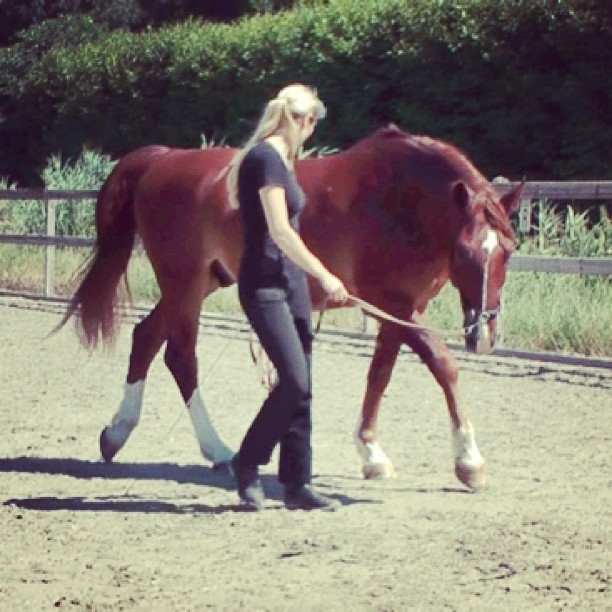
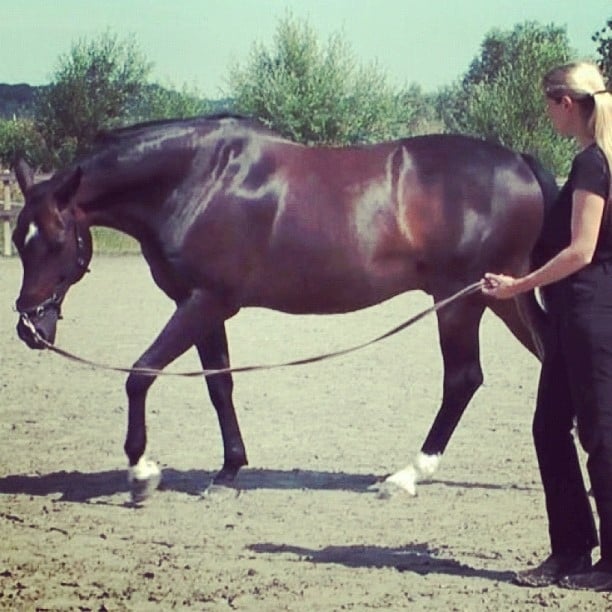
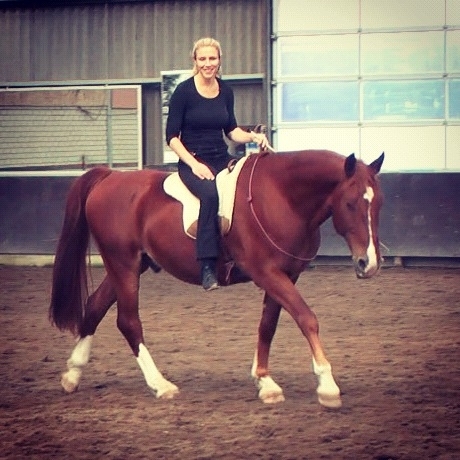
Developing the LFS will make sure that everything that needs to happens in the horse’s whole body will happen to make it possible for the horse to curve with the arc of the circle in both directions. The right amount of bending – flexion – rotation in each area of the spine will happen automatically when you focus on the LFS:

And once the LFS is established, the hind legs can start to take weight by following the logical system of progressive exercises.
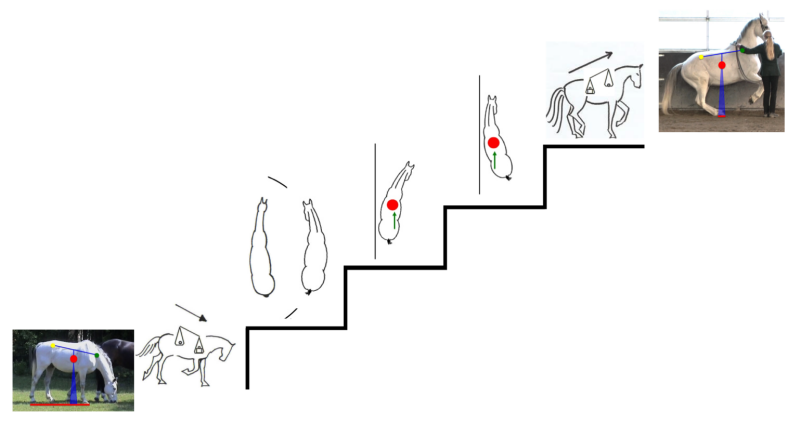
Click HERE for an overview of the Logical System of Progressive Exercises >>

